Picture your morning routine. You reach for your mascara, and it’s buried under three lip balms, a dried-up foundation and a stray hair tie. Sound familiar?
The bathroom is where most of us get ready, yet it’s also the hardest place to keep makeup and skincare organized. Counters are small, drawers fill up fast and steam makes things trickier.
The good news is that organizing makeup in a bathroom doesn’t need a big budget or a renovation. It needs a simple system: declutter, sort, then store everything in a way that fits your space.
Below you’ll find a 4-step method, 12 practical makeup storage ideas for small and large bathrooms, and a section on protecting your cosmetics from bathroom humidity and heat.
Table of Contents
Quick Answer: How to Organize Makeup in a Bathroom (4 Steps)
- Declutter: Toss expired, dried-out or unused makeup and skincare.
- Clean: Wipe products, wash brushes and clean the storage area.
- Sort: Group cosmetics by type and by how often you use them.
- Store: Pick a makeup organizer that fits your bathroom layout, and keep daily items within easy reach.
Should You Store Makeup in the Bathroom? How Humidity Affects Your Cosmetics
Before you buy a single makeup organizer, ask one question first: is the bathroom the right place for your makeup?
A hot shower fills a small room with steam, warmth and moisture. The U.S. FDA says cosmetics that are stored improperly, for example in high heat or sunlight, can deteriorate well before their expiration date. It also notes that some manufacturers test their products at different temperatures and humidity levels to see how conditions affect shelf life.
That doesn’t mean makeup can’t live in the bathroom. It just helps to be choosy about what stays.
Good to keep in the bathroom:
- Products you use every day, such as moisturizer, sunscreen, mascara and lip balm
- Items stored in closed drawers, cabinets or lidded containers
- Skincare and makeup you apply right at the sink
Consider moving to a bedroom or closet:
- Backup products and duplicates
- Special-occasion makeup and rarely used palettes
- Anything you reach for less than a few times a month
Here’s a quick example. If you use tinted moisturizer, mascara and lip balm every morning, keep those in a drawer near the sink. Your glittery party eyeshadow palette can live in a bedroom drawer or a closet bin.
How to Organize Makeup in a Bathroom: 4 Easy Steps (Declutter, Clean, Sort and Store)
This is the heart of the process. Follow the steps in order, and the rest gets much easier.
Step 1: Gather Everything and Declutter Expired Makeup
Start by collecting makeup and skincare from every place it hides: drawers, bags, shelves, the shower caddy and that one old purse.
Put it all on a clean towel or counter. Seeing everything together makes duplicates and forgotten products easy to spot.
Then sort it into four piles:
- Keep and use: Your regular favorites
- Keep elsewhere: Backups and special-occasion items
- Donate: Unopened, unused products you won’t use
- Toss: Empty, damaged, dried-out or expired makeup
How to tell if makeup is expired: Look for the small open-jar symbol with a number and the letter “M” on the packaging. It shows the suggested months of use after opening. For example, “12M” means about 12 months.
No symbol? Use the rules of thumb below. Always follow the product label first.
| Product | Common rule of thumb | Signs it’s time to toss |
|---|---|---|
| Mascara | 3 months after purchase (FDA advice) | Dry, clumpy or smells off |
| Liquid eyeliner | Often replaced on a similar schedule to mascara | Dried out, flaky or smells different |
| Eye pencils | Up to about 2 years | Crumbly, hard to sharpen or smells off |
| Liquid foundation and concealer | About 12 months | Separates, thickens or smells off |
| Powder products (blush, bronzer, eyeshadow) | Check the label | Hard, patchy surface, odd smell or skin irritation |
| Lipstick and lip gloss | Often 1–2 years | Strange smell, or a grainy or greasy texture |
Swipe left or right to view all columns →
The FDA calls expiration dates “rules of thumb” and says products stored in heat or sunlight can go bad sooner. It also advises discarding dried-up mascara and never adding water or saliva to revive it.
One more safety point from the FDA’s eye cosmetic guidance: if you ever have an eye infection, stop using eye makeup, discard the products you were using and see a doctor.
Pro tip: Write the date you open each product on it with a permanent marker. It takes five seconds and saves you from guessing later.
Step 2: Clean Your Makeup, Brushes and Bathroom Vanity
Now that you’ve cut the clutter, give everything a fresh start.
- Wipe the outside of bottles, tubes and compacts.
- Wash makeup brushes and sponges with gentle soap and lukewarm water, then let them dry completely.
- Clean the drawer, shelf or counter where your makeup will live.
The FDA also suggests washing your hands before applying eye makeup and keeping containers clean and free of dust and dirt.
Pro tip: Don’t put damp brushes back into a closed container. Leftover moisture can encourage germs and odors.
Step 3: Sort Cosmetics by Type and How Often You Use Them
This step is what makes your system actually work.
First, group by type:
- Face: Foundation, concealer, powder, blush, bronzer
- Eyes: Mascara, eyeliner, eyeshadow, brow products
- Lips: Lipstick, gloss, lip liner, balm
- Tools: Brushes, sponges, tweezers, eyelash curlers
- Skincare: Moisturizer, sunscreen and serums, if they share the space
Then, within each group, put daily items in front and occasional ones behind or in a lower drawer.
Real-life example: If you wear mascara and lip balm every day, they belong at the front of the drawer, in your “grab-and-go” zone. The bold red lipstick you wear twice a year can sit at the back.
Step 4: Match Your Bathroom Vanity Layout With the Right Cosmetic Storage
Here’s where many guides simply say “buy an organizer.” The best makeup storage depends on what your bathroom actually looks like.
| Your bathroom setup | Best makeup storage solution |
|---|---|
| Small counter | A tray, rotating organizer or tiered organizer for daily items |
| Vanity with drawers | Drawer dividers or stackable clear bins |
| Pedestal sink (no counter or drawers) | Over-the-door organizer, wall shelf or slim rolling cart |
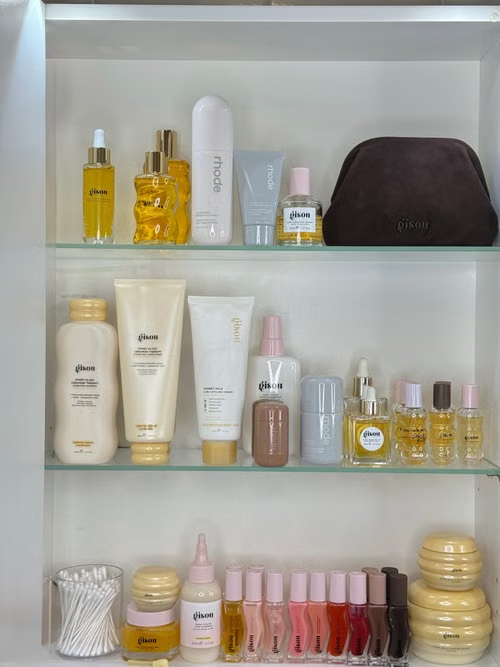
| Medicine cabinet only | Small bins on the shelves and storage on the inside of the door |
| Shared bathroom | One labeled bin or pouch per person |
| Rental (no drilling) | Adhesive hooks, over-the-door organizers and freestanding carts |
Swipe left or right to view all columns →
12 Makeup Storage Ideas for Small Bathrooms: Countertop, Drawer and Wall Solutions
Now for the fun part. These bathroom makeup storage ideas are grouped by where they fit, so you can jump straight to the one that matches your space. Most people end up mixing two or three.
Countertop Makeup Storage Ideas
1. Use a Makeup Tray to Create a Daily Zone
A vanity tray gathers your everyday products in one spot and keeps them off the bare counter. On cleaning day, lift the tray, wipe the counter and set it back down. Stick to the five or six things you reach for every morning.

2. Try a Clear Tiered Makeup Organizer
Tiers use vertical space, so you get more countertop makeup storage without taking over the sink. Clear levels let you see lipsticks and compacts at a glance, which also helps you stop buying duplicates.
3. Add a Rotating Makeup Organizer
A rotating makeup organizer is great for small bathroom makeup storage because one spin brings every product within reach. Fill it with your daily makeup and skincare so the rest of the counter stays clear.
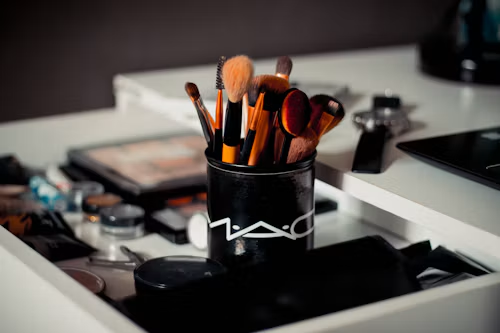
4. Keep Brushes in a Jar or Brush Holder
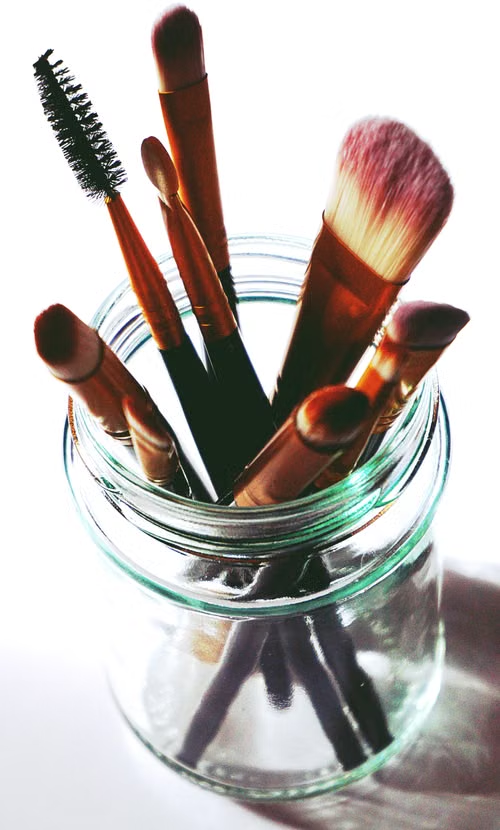
An upright makeup brush holder keeps bristles in shape and easy to grab. A clean glass jar works too. Just make sure brushes are completely dry first (more on that in the brush section below).
Drawer and Cabinet Makeup Organization Ideas
5. Use Drawer Dividers for a Neat Makeup Drawer
Drawer dividers turn one jumbled drawer into neat zones for lips, eyes, face and tools. Measure the drawer before you buy so the pieces fit snugly, and keep daily items at the front. It’s one of the easiest makeup drawer organizer upgrades you can make.
6. Stack Clear Bins or Drawer Sets
No built-in drawers? Stackable clear bins work on a shelf or inside a cabinet, and you can lift one out and carry it to another room. Label the fronts if you share the space.
7. Use the Under-Sink Cabinet for Backups
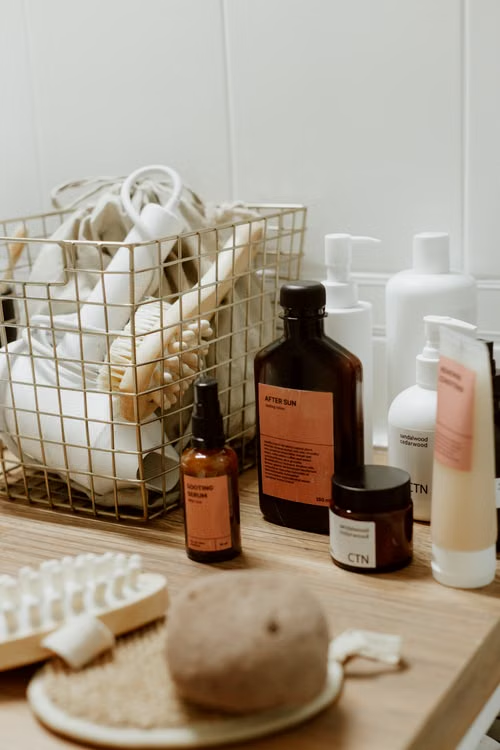
Small bins or a caddy keep backup products tidy under the sink. Use lidded bins for makeup, keep cleaning supplies in a separate bin, and check the area now and then for dampness.
Wall and Over-the-Door Makeup Storage for Small Bathrooms
8. Hang an Over-the-Door Organizer
An over-the-door organizer is a renter-friendly way to add storage with no drilling. The pockets suit backups, hair tools and skincare, so your counter and drawers stay free for daily makeup.
9. Install Floating Shelves or a Ladder Shelf
Shelves free up counter space and let you display a few pretty items. Keep daily products at eye level, and choose a freestanding ladder shelf if you can’t drill into the wall.
10. Add a Magnetic Makeup Board
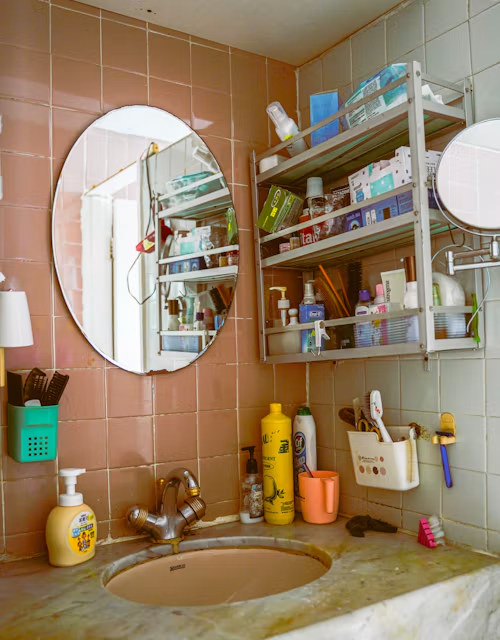
A magnetic board holds magnetic palettes and metal tools such as tweezers, and you can stick a reminder note on it too. It works best for lightweight items, so check the weight limit before you load it up.
11. Slide in a Slim Rolling Cart
Is there a narrow gap beside the vanity or between the toilet and the sink? A slim rolling cart fits there and holds a surprising amount. Roll it out of the way when you’re done.
12. Use the Medicine Cabinet Door
The inside of a medicine cabinet door is often unused. Small bins or adhesive organizers can turn it into hidden makeup storage, which is perfect when the counter is tiny. Keep the load light so the door still closes properly.
How to Store and Clean Makeup Brushes and Tools (Hygienic Brush Storage)
Brushes, sponges and small tools pick up oils and product every time you use them, so give them a home of their own. Clean, dry and upright is the goal.
- Store clean, dry brushes upright in a holder, or lay them flat in a shallow drawer tray.
- Let brushes and sponges dry completely before you put them away. Damp tools in a closed container trap moisture.
- Use a small lidded box for tweezers, eyelash curlers and other little tools.
- Keep a “to wash” container so dirty tools never mix with clean ones.
- Don’t share makeup or applicators. The FDA says sharing makeup increases the risk of contamination.
How often should you wash them? A common rule of thumb is about once a week for face brushes and every couple of weeks for eye brushes, and sooner if they look dirty or smell off.
How to Protect Makeup From Bathroom Humidity, Steam and Heat
You can’t change your bathroom’s climate, but you can change how your makeup lives in it. Because the FDA notes that heat and sunlight can shorten a product’s life, a warm, steamy room is worth planning around. These simple habits help your cosmetics last longer:
- Use lidded containers or closed drawers so products stay protected from steam.
- Keep makeup away from the shower or tub. Place it as far from the water as your layout allows.
- Run the exhaust fan or open the door for a few minutes after showers so the air can clear.
- Keep caps and lids tightly closed.
- Dry brushes and sponges completely before storing them.
- Wipe condensation off trays, shelves and organizers.
- Avoid direct sunlight and heat sources such as a sunny windowsill or a heated towel rail.
Quick example: If your counter sits right beside the shower, move your daily products into a closed drawer or a lidded organizer instead of leaving them out in the open.
How to Organize Makeup in a Shared Bathroom, With Kids or a Large Collection
Not every bathroom or household is the same. Here’s how to adapt your makeup storage to your situation.
Shared Bathroom Makeup Storage
Give each person one labeled bin or pouch. It stops mix-ups and keeps counters tidy. It also helps everyone keep their own products, which matters because sharing makeup raises the risk of contamination.
Large Makeup Collections
Keep your everyday favorites in the bathroom and rotate the rest. Store extras in a bedroom drawer, a closet bin or a rolling cart. A simple “one in, one out” rule stops the collection from creeping back.
Makeup Storage in Homes With Kids
Use closed or higher storage, and keep makeup, brushes and other small items out of young children’s reach. A drawer with a lid or a high shelf works well.
Travel Makeup Pouch
Keep a small grab-and-go pouch with your essentials so you don’t have to pull out your whole collection for a trip. Avoid leaving it in a hot car, since heat can shorten the life of cosmetics.
Budget Makeup Storage Ideas: Affordable and DIY Ways to Organize Cosmetics
You don’t need to spend a lot to get a tidy setup. Start with what you already own, then add pieces as you need them. (Prices vary by store, so treat these tiers as rough guides.)
- Under $10 (DIY): Use jars, mugs and small bowls for brushes and lip products, and repurpose small boxes as drawer dividers.
- $10 to $25: Add drawer dividers, stackable clear bins, a vanity tray or an over-the-door pocket organizer.
- $25 and up: Invest in a rotating organizer, a multi-tier drawer set or a slim rolling cart.
Tip: Declutter first. Once the expired and unused products are gone, you may find you need a smaller organizer than you planned to buy.
How to Choose the Best Makeup Organizer for a Bathroom (Buying Checklist)
Before you click “add to cart,” run through this quick checklist so your makeup organizer actually fits and lasts in a damp room.
- Measure first. Write down the width, depth and height of your drawer, shelf or counter space, and snap a photo with the numbers on it.
- Pick easy-to-wipe, water-resistant materials so steam and splashes don’t ruin the organizer.
- Decide between clear and opaque. Clear helps you see everything fast, while opaque hides clutter.
- Look for stackable or modular pieces so your setup can grow with your collection.
- Choose smooth, easy-to-clean designs without deep crevices where dust and residue collect.
- Check stability and weight limits, especially for counter organizers and anything that hangs.
| Material | Good for | Watch out for |
|---|---|---|
| Acrylic | Clear, wipe-clean counter and drawer organizers | Can scratch over time |
| Plastic bins | Lightweight, affordable drawer and cabinet storage | Quality varies, so check the thickness |
| Bamboo or wood | A warm, natural look | Needs a sealed finish in a steamy room |
| Fabric or cardboard | Bedroom or closet storage | Absorbs moisture, so it’s not ideal in a bathroom |
Swipe left or right to view all columns →
7 Common Bathroom Makeup Organizing Mistakes to Avoid
Even a good system can fall apart if you trip over these. Here’s what to watch for:
- Buying organizers before decluttering. You may end up with too many pieces or the wrong sizes.
- Keeping everything on the counter. It looks crowded, collects splashes and is harder to clean.
- Storing makeup right next to the shower. Steam and warmth are tough on cosmetics.
- Holding on to old or dried-out products. If mascara has dried out, the FDA says to discard it instead of adding water or saliva.
- Putting damp brushes away. Always let them dry completely first.
- Skipping measurements. Organizers that don’t fit slide around and waste space.
- Organizing for looks only. Your system should match your daily routine, not just photograph well.
Makeup Storage Maintenance Checklist: Weekly, Monthly and Quarterly Habits
A tidy system only stays tidy if you keep it up. Here’s a simple routine you can print or save:
Weekly
- Wipe counters, trays and shelves
- Put everything back in its place
- Wash face brushes
Monthly
- Wash or wipe down your organizers and drawer dividers
- Wash eye brushes and sponges
- Check products for changes in smell, color or texture
Every 3 months
- Do a full declutter and expiry check
- Swap seasonal items in and out
- Replace mascara if it’s about three months old, as some industry experts recommend
Frequently Asked Questions About Organizing Makeup in the Bathroom
Should you keep makeup in the bathroom?
You can, if you’re smart about it. Keep daily items in closed drawers or lidded containers away from the shower, and store backups and rarely used products in a bedroom or closet.
How do I organize makeup in a small bathroom?
Use vertical space. Try a tiered or rotating organizer, an over-the-door organizer or floating shelves, and keep only your daily products in the bathroom.
What is the best way to store makeup in a humid bathroom?
Use lidded containers or closed drawers, keep makeup away from the shower, run the exhaust fan after showers and make sure brushes and sponges are fully dry before storing them.
How do I organize makeup without drawers or counter space?
Try an over-the-door organizer, a wall or ladder shelf, a slim rolling cart or small bins on the inside of the medicine cabinet door.
How do I organize a makeup drawer?
Measure the drawer, then use dividers or small bins to separate lips, eyes, face and tools. Keep daily items at the front and occasional ones at the back.
Final Thoughts: Keep Your Bathroom Makeup Organized (and Start Small)
Learning how to organize makeup in a bathroom comes down to three habits: keep what you use, give everything a home and protect your products from steam and heat.
You don’t have to do it all in one afternoon. Start with one drawer or one counter zone, and build from there. In a week or two, getting ready will feel noticeably easier.